Set up a new station when using the RTP protocol in the latest LUCI Studio version with our newest RTP Connection Wizard. The Wizard helps you setting up step by step your new station that uses the RTP Audio protocol for your Audio over IP connections.
Start the Wizard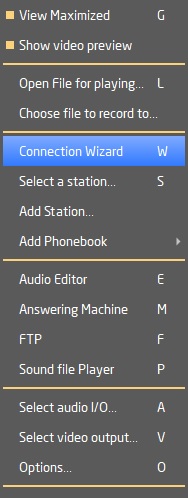
Open LUCI Studio, click the menu button and select the Connection Wizard from the menu. This will open the Connection Wizard in a separate tab.
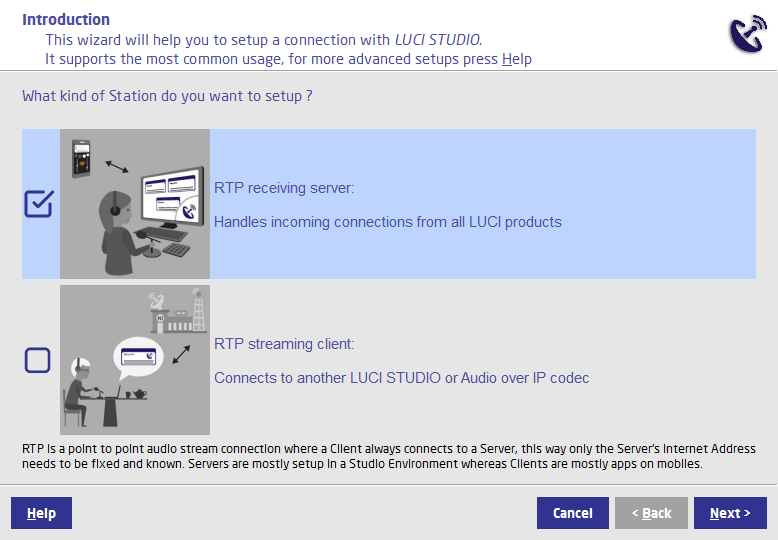
Introduction
Choose what kind of Station you want to set up for LUCI Studio.
Option 1, RTP Audio receiving server
Which configures your LUCI Studio as a receiver of incoming connections from all LUCI products, such as LUCI LIVE / SE / LITE / Subscribe.
Option 2, RTP Audio transmitter
Which configures your LUCI Studio in such a way that you can connect to another LUCI Studio or an Audio over IP codec / product.
Option 1: RTP Audio receiving server
1.1 Universal Plug and Play (UPnP) Check
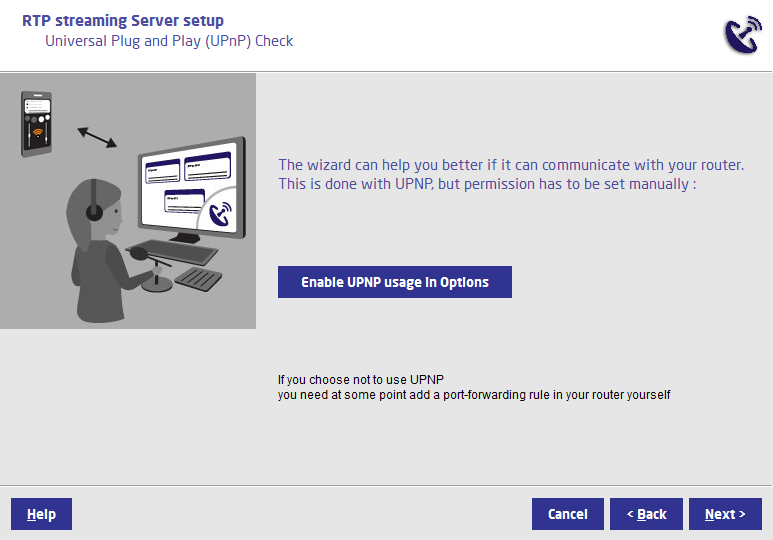
UPnP can help the LUCI Studio Wizard to communicate with your router. This “Enable UPNP usage in Options” button opens the Options menu.
The intention of the wizard using UPnP is to make sure LUCI Studio is reachable from the public internet by setting the needed port-forwarding rule for the RTP Audio protocol in your router and test if LUCI Studio is indeed reachable on that port from the global internet.
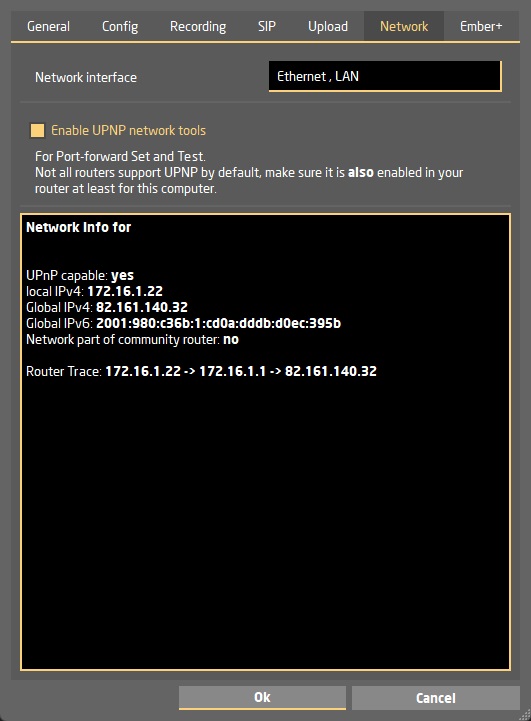
In the Network tab from the Options menu. You can choose the “Enable UPNP network tools” and let the LUCI Studio Wizard communicate with your router.
Note: Not all routers support UPNP by default, make sure it is also enabled in your router at least for this computer.
1.2 Determine the internet data port to receive incoming audio.

Here you will fill in the UDP* receiving port. LUCI Studio will use in this example the 6010 port to monitor for incoming connections. You can choose your own free port on your local network in range from 1000 to 9999.
*This is the port in your router which will be opened to let the remote LUCI product connect directly to LUCI Studio, ensuring you will have a point-to-point audio-over-IP connection. The RTP Audio protocol uses the UDP internet standard to send and receive audio.
On selecting “Next”, the wizard will try to set the port-forwarding rule in your router. If it fails you will receive a message UPnP pop-up with details. Read more about UPnP and port-forwarding below.
1.3 Determine the return stream audio codec.
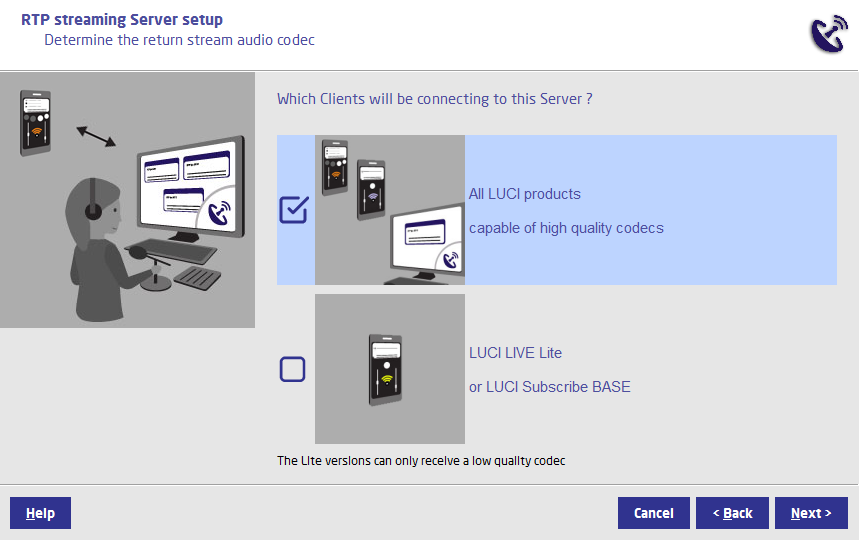
Select which LUCI products you will connect remotely to this LUCI Studio server. This will determine the audio codec for the audio send to this LUCI product.
1.4 Minimizing drop outs.
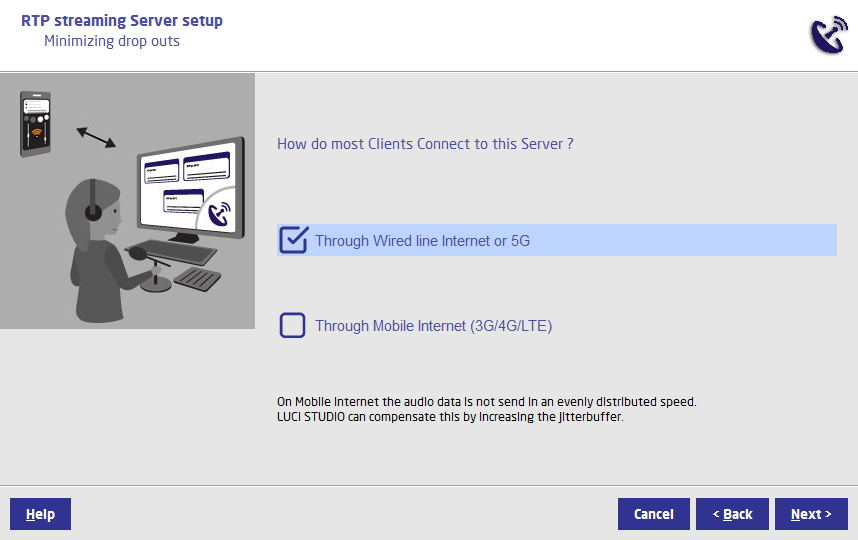
Try to assess how your clients will use the LUCI product to connect to the internet in day-to-day use.
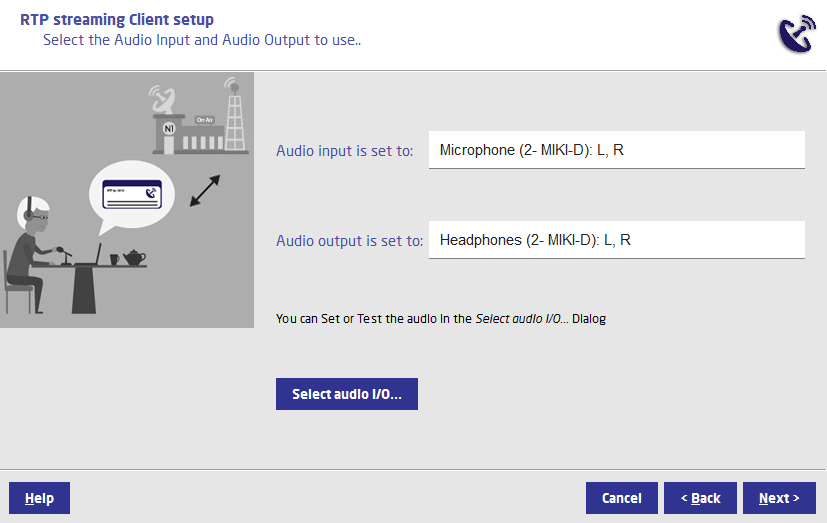
1.5 Select the Audio Input and Audio Output to use.
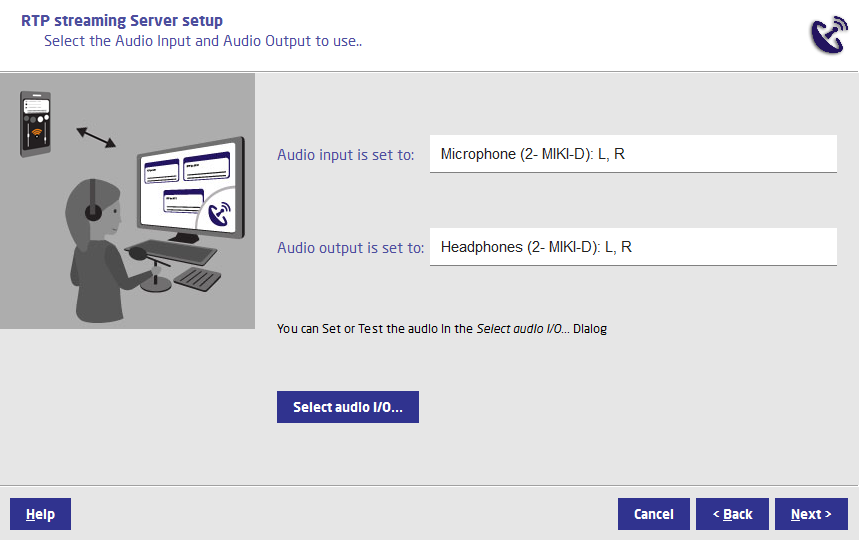
Select the audio input and output device channels to be used upon connection. You can find all connected audio devices under “Select audio I/O” button.
1.6 What is the name of the station?
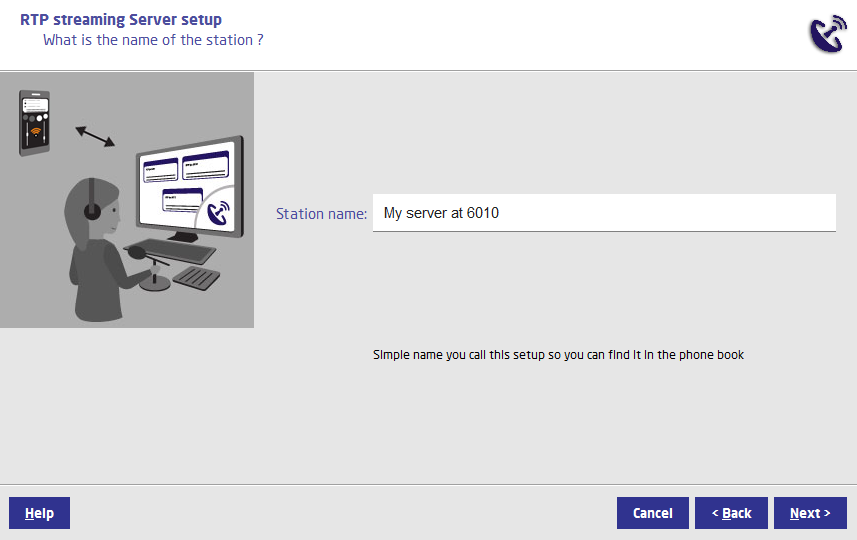
By naming this station you will find this easily in your stations list.
1.7 All set to receive Connections
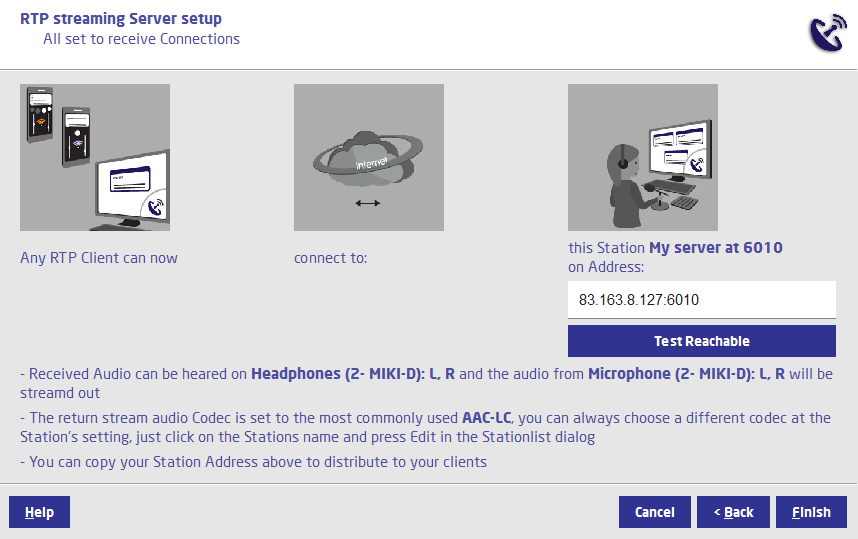
Here you will find all details regarding your configuration.
The most important is the IP-Address and Port ( e.g.: 83.168.8.127:6010 ). Your remote contributors need to fill this into their LUCI station “destination” to be able to connect to your station. Please share this main access information to your contributors in order for them to make a connection.
If you have UPnP enabled, you can test the reach-ability of your station by clicking the “Test Reachable” button. The UPnP popup window will give you the result of that test. Read more about UPnP and port-forwarding below.
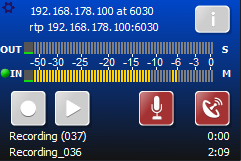
By clicking “Finish” you close the wizard and your station is configured, the audio device is routed and LUCI Studio is active to receive a connection. If the other side has it’s connection also active you will see a green dot at the IN meter.
Option 2: RTP Audio streaming client
2.1 Connects to another LUCI STUDIO or Audio-Over-IP codec devices
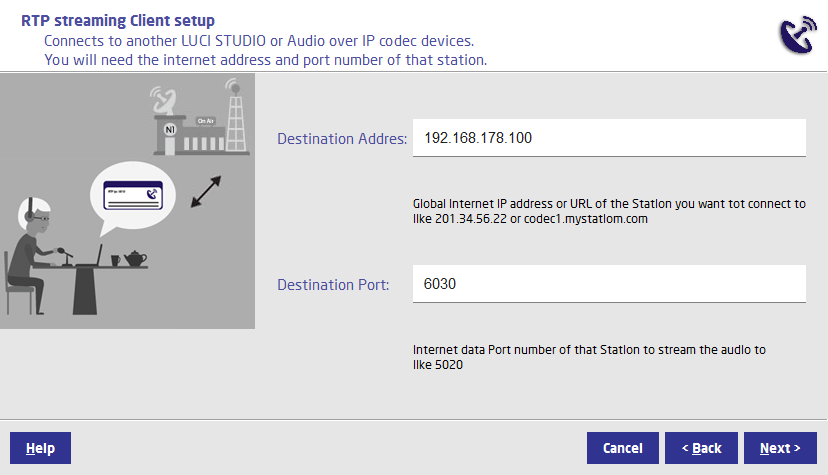
Here you will fill the destination address and destination port the station you want to connect to.
These details should be supplied by that station.
2.2 Audio quality selection
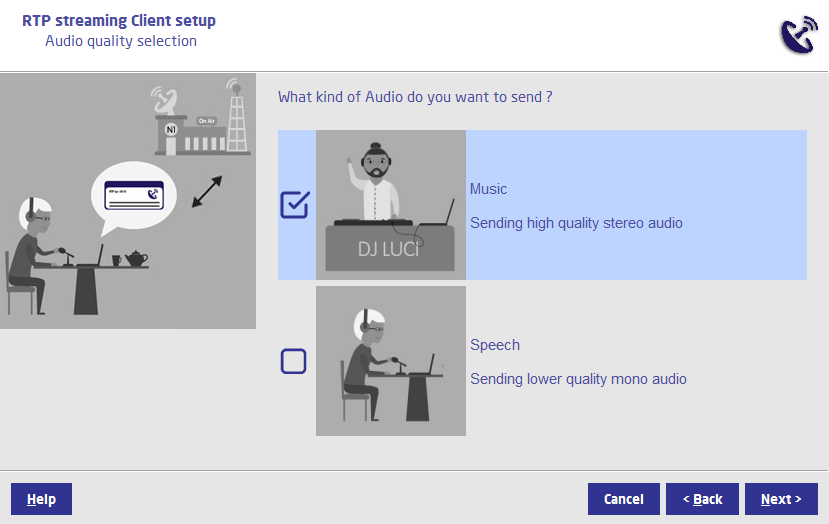
You can select what kind of audio content you would like to send, this selection helps the Wizard to find the best audio codec for your content.
2.3 Select the Audio Input and Audio Output to use.
Select the audio input and output device channels to be used upon connection. You can find all connected audio devices under “Select audio I/O” button
2.4 What is the name of the station?

By naming this station you will find this easily in your stations list.
2.5 All set to connect to another LUCI STUDIO or Audio over IP codec

In this windows you will find all details regarding your configuration.
By clicking finish you close the wizard and your station is configured, the audio device is routed, the connection is activated and the mic button is switched ON. If the receiving station is active you will see a green dot at the IN meter.
UPnP port forwarding
If you have an UPnP enabled router, the LUCI Studio Wizard can access your router and forward a port automatically. First you should give LUCI Studio permission to use UPnP in the Network tab of the Options Menu.
Note: Not all routers support UPNP by default, make sure it is also enabled in your router at least for this computer.
UPnP pop-ups
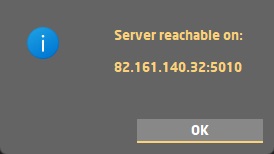
If you have UPnP enabled and the port is set on your router you will see the following message. Reachable means that all LUCI products can connect to your LUCI Studio with these access details.
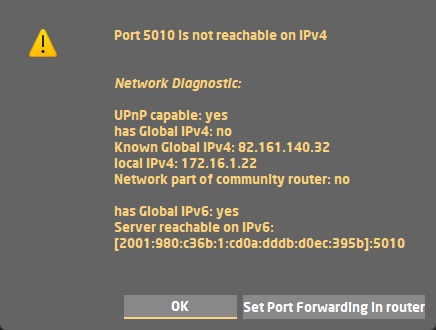
If you have UPnP enabled and the port is not available you get the following message. This means your station cannot be reached from the
You can click the “Set Port Forwarding in router” to setup the port forwarding in your router with the use of UPnP.global internet. See below for the most common reasons.
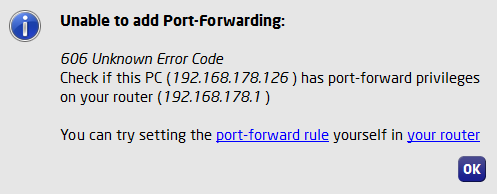
When you get the following pop-up you can try to port-forward manually by clicking the links in the pop-up windows. If you are not that technically skilled we suggest contacting your IT department to help you port-forward the UDP connection (that the RTP Audio protocol uses) to the LUCI Studio computer. You can find more information about the port-forward rule on our Techblog here.
Most common reasons to fail to set the port-forwarding rule in your router are:
- The router cannot handle UPnP or it is not permitted. Please check the routers manual of how to enable UPnP for this PC.
- The port is already set for another PC. Pleas use a different port number.
- There are more routers in the path to the global internet. The port-forwarding rule should be set on both routers, First router setting the port-forward to the second router, and the second router setting the port-forward to the PC that runs LUCI Studio.
- Your internet connection is part of a community router. This means that you share a global internet IPv4 address with the whole neighbourhood. You cannot use the commonly used IPv4, but if supported, you could use IPv6.